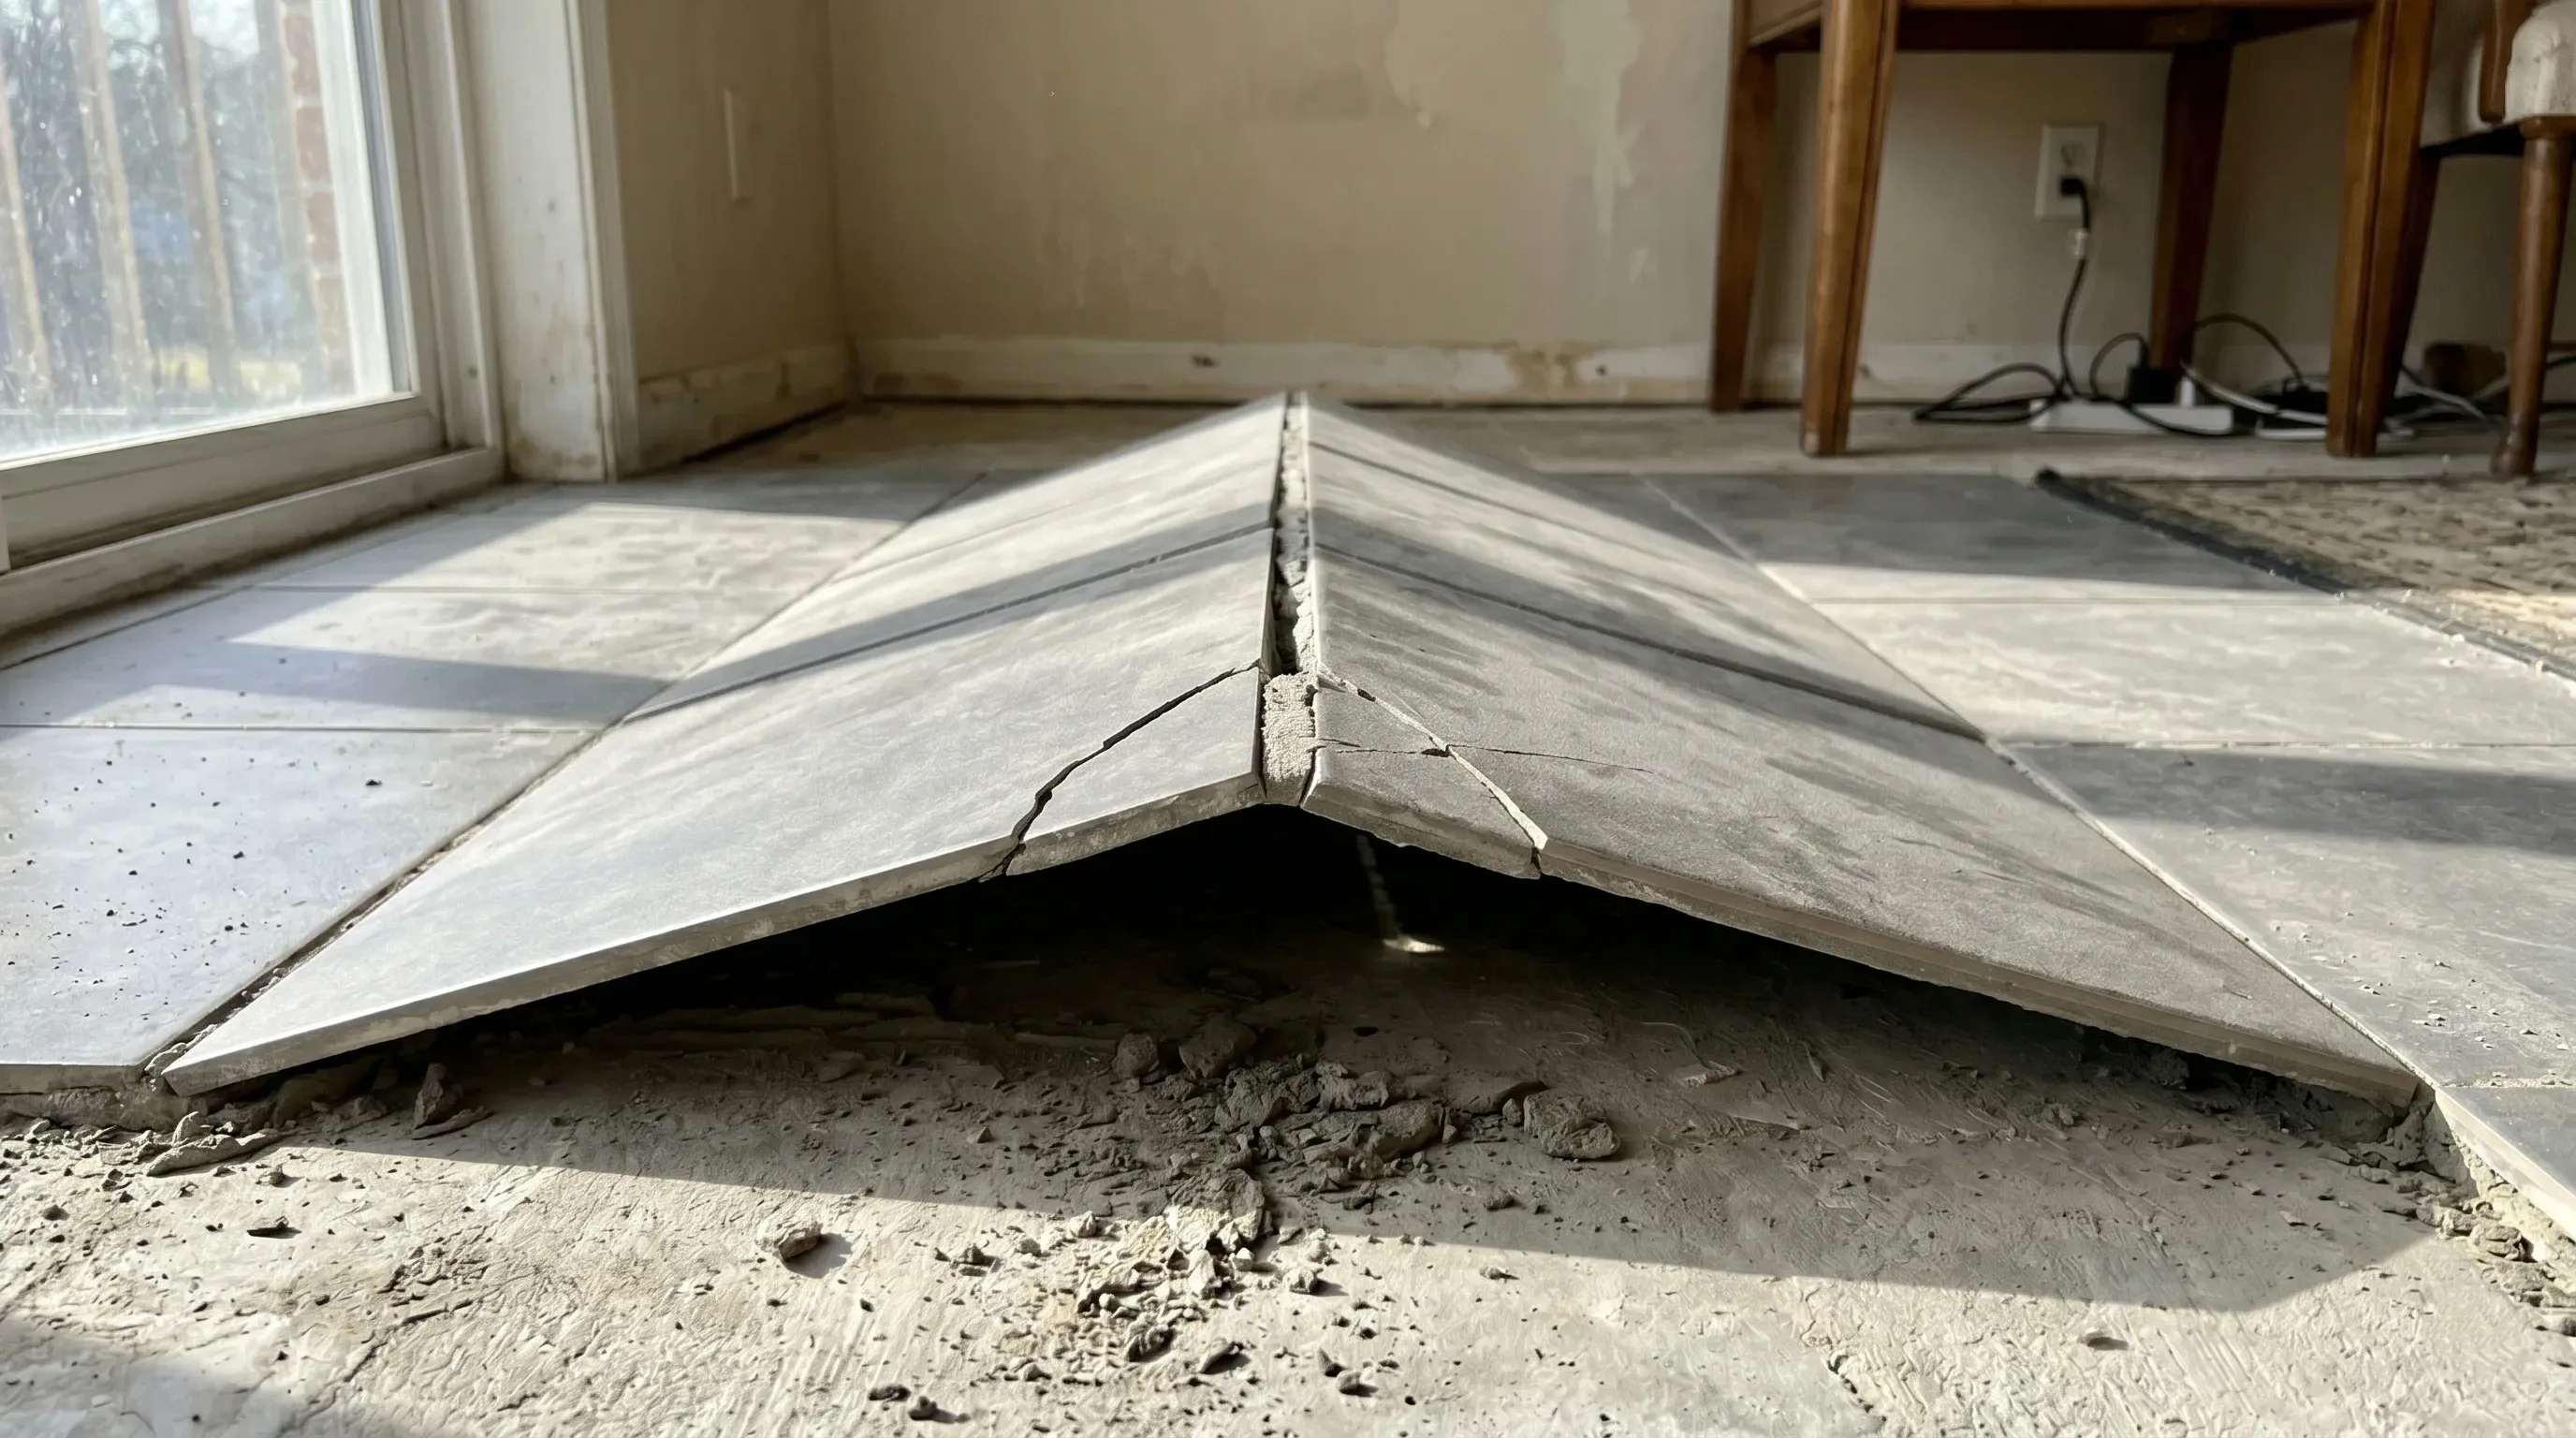
Introduction
When tiles unexpectedly lift, bend, and push against each other to form a tent-like shape across your floor.
For homeowners and builders managing residential construction in Shimla, ignoring the early warning signs can eventually lead to flooring failure that requires complete removal and reinstallation of the affected area. Understanding the warning signs early helps protect both your budget and your home's long-term structural performance.
Quick Checklist for Tile Tenting
Before lifting any tiles or calling your contractor, compare your flooring with the warning signs below. Each symptom often points toward a different structural problem beneath the finished surface.
| Warning Sign | Primary Underlying Cause | Immediate Risk Level | Recommended Action |
|---|---|---|---|
| Hollow Sounding Floors | Adhesion failure or loss of bond with the subfloor. | Medium — Structural bond is weakening. | Restrict heavy foot traffic and inspect nearby expansion joints. |
| Hairline Grout Cracks | Micro-movements caused by structural shifting or thermal expansion. | Medium — Moisture may begin entering beneath the tiles. | Remove loose grout and inspect the surrounding floor carefully. |
| Lifting or Tented Tile Ridges | Complete absence of movement joints under compression. | High — Tiles may suddenly crack or explode upward. | Keep people away from the area and contact a flooring specialist. |
| Buckled Wooden Skirting | Stress transferred from expanding tiles into adjacent woodwork. | High — Pressure may already be affecting the subfloor. | Remove a section of skirting and verify that a perimeter expansion gap exists. |
Why Shimla's Climate Makes Tile Tenting More Common
Tile tenting occurs because every construction material naturally expands and contracts. Concrete, vitrified tiles, natural stone, wood, adhesives, and grout all respond differently to changes in temperature and humidity. When a flooring system cannot safely absorb these movements, internal stress builds until the tiles suddenly release that pressure by lifting away from the floor.
Mountain regions such as Shimla experience environmental conditions that accelerate this process, making proper installation even more important than in Plains climates.
A flooring system designed without proper expansion planning may perform perfectly during one season and fail dramatically after several years of repeated thermal cycles.
1. Extreme Seasonal Temperature Changes
Winter temperatures can fall dramatically while summer sunlight heats floor surfaces throughout the day. These continuous expansion and contraction cycles gradually increase internal pressure beneath rigid flooring systems.
2. Monsoon Moisture and Humidity
During the monsoon season, moisture levels rise significantly. Wooden subfloors, plywood, laminated boards, and surrounding structural materials absorb moisture and expand, transferring additional stress into ceramic, vitrified, marble, and granite flooring.
3. Mountain Slope Settlement
Homes built on sloping terrain experience small structural movements over time as foundations naturally settle. Although these movements are usually minor, rigid floor coverings often absorb this stress first, increasing the likelihood of grout cracking, debonding, and tile tenting.
Expert Insight
Proper expansion joints, premium polymer-modified adhesives, and careful subfloor preparation allow flooring systems to accommodate seasonal movement instead of fighting against it. These relatively small installation often determine whether a floor lasts for decades or fails within just a few years.
Root Causes of Adhesion and Flooring Failure
Preventing tile tenting begins long before the first tile is installed. Most flooring failures originate during installation, where seemingly small shortcuts create internal stresses that slowly build over months or even years before finally becoming visible.
1. Inadequate Expansion and Movement Joints
The most common cause of tile tenting is the complete absence of expansion joints. Every flooring material naturally expands and contracts with seasonal temperature changes. Without dedicated movement gaps, those forces continue building until the floor can no longer absorb them.
Many inexperienced installers place tiles tightly against walls, structural columns, kitchen cabinets, staircases, or bathroom vanities. As pressure increases throughout the floor, the tiles have nowhere to move except upward, producing the characteristic tent-like ridge.
Larger formats such as vitrified tiles, granite slabs, and marble flooring generate even greater compressive forces because of their larger surface area and lower flexibility.
2. Moisture and Subfloor Preparation Errors
Even the highest-quality tiles cannot compensate for an improperly prepared subfloor. If concrete retains excess moisture because it has not cured fully, that moisture gradually weakens the adhesive beneath the flooring.
Water vapor slowly breaks the bond between the thinset adhesive and the concrete surface. As adhesion decreases, sections of flooring begin to sound hollow underfoot before eventually separating completely from the substrate.
Moisture problems are particularly important beneath kitchens, bathrooms, utility areas, and locations where plumbing lines pass through the floor. Poor waterproofing or unnoticed leaks continually expose the adhesive to damp conditions that shorten its lifespan.
Concrete should normally cure for at least 7-14 days before flooring is installed. Rushing this stage traps moisture beneath the finished floor and greatly increases the risk of future debonding.
3. Poor Adhesive Coverage ("Dot Curing")
Another common installation shortcut is applying adhesive only to the center and corners of each tile instead of spreading it evenly across the entire surface.
This practice creates large hollow pockets beneath the tile. Under normal walking loads these unsupported areas flex repeatedly until the adhesive bond eventually fails.
Once several neighboring tiles lose adhesion, internal compression transfers rapidly across the floor, significantly increasing the chance of widespread tenting.
Expert Insight
Premium polymer-modified adhesives remain slightly flexible after curing, allowing them to absorb small structural movements. Traditional cement-sand bedding or low-quality generic adhesives become much more brittle over time, making them a leading cause of premature flooring failure beneath dense vitrified tiles.
Managing Your Layout
Preventing flooring failures requires more than purchasing premium tiles. Homeowners should actively monitor installation quality and ensure every stage follows accepted construction practices before work progresses to the next phase.
1. Verify Material Quantities and Quality
Always calculate and purchase an additional 10% to 15% of the selected flooring material. This reserve covers layout cuts, accidental breakage, and future repairs that may become necessary years later.
Purchasing the complete quantity from the same batch helps maintain consistent colour, texture, dimensions, and surface finish throughout the installation.
2. Enforce Proper Expansion Joint Layouts
Movement joints should never be treated as optional. They form part of the structural design of every large flooring installation.
- Maintain a perimeter gap of approximately 6 mm to 8 mm around all walls, columns, kitchen cabinets, wardrobes, and fixed furniture.
- Install field expansion joints every 4 to 6 metres across large indoor floor areas to divide the surface into smaller stress-relieving sections.
- Conceal perimeter joints beneath skirting boards rather than filling them with rigid grout.
3. Monitor the Subfloor and Curing Process
Do not allow installation schedules to be rushed simply to save time. Every layer beneath the finished flooring should be clean, level, dry, and fully cured before adhesive is applied.
Where plywood, boards, or composite substrates are used, allow sufficient time for the material to acclimatize to Shimla's local temperature and humidity before installation begins.
Quality Control Checklist
A homeowner who periodically checks adhesive coverage, expansion gaps, curing times, and material quality during installation dramatically reduces the likelihood of expensive flooring failures after project completion.
Comprehensive Troubleshooting Protocol
If you notice hollow sounds beneath your flooring, grout joints, or tiles beginning to lift, avoid simply replacing the visible damaged pieces. Tile tenting is usually the result of pressure building beneath the entire floor, meaning the underlying cause must be addressed before new tiles are installed.
The following step-by-step protocol helps reduce additional damage while preparing the affected area for proper repair.
[Isolate and Protect]
Remove heavy furniture, keep people away,
and cover loose tiles to prevent injury.
[Relieve Internal Pressure]
Carefully remove the surrounding grout joints
to release built-up compression.
[Inspect the Subfloor]
Lift the damaged tiles and examine the
adhesive, concrete surface, and expansion gaps.
[Repair Correctly]
Repair cracks, prepare the substrate,
apply premium adhesive,
and reinstall new tiles.
Why Simply Replacing One Tile Usually Fails
Many homeowners replace only the visibly damaged tile while leaving the surrounding floor untouched. Unfortunately, this rarely solves the problem. If the internal pressure remains trapped beneath the flooring system, another section may tent weeks or months later.
Successful repairs require identifying the original source of stress, whether it is missing expansion joints, moisture beneath the floor, inadequate adhesive coverage, or structural movement within the building.
Forcing tented tiles downward without eliminating the pressure underneath can crack neighbouring tiles, weaken the adhesive bond even further, and create a much larger repair area.
Summary: The Final Blueprint for Your Build
Tile tenting is rarely caused by a single defective tile. In nearly every case, it results from pressure that has been quietly building beneath the flooring system due to missing expansion joints, moisture problems, poor adhesive practices, or natural structural movement.
While using inexpensive materials or rushing installation may appear to reduce construction costs initially, the long-term consequences often include cracked flooring, damaged woodwork, expensive repairs, and complete floor replacement.
Build for the Next 20 Years, Not the Next Two
Investing in certified vitrified tiles, premium polymer-modified adhesives, properly cured concrete, and correctly planned expansion joints allows your flooring system to adapt naturally to seasonal movement instead of resisting it.
The Best Repair Is Prevention
Careful planning, quality materials, skilled workmanship, and routine site inspections during installation remain the most effective way to prevent tile tenting and protect your home's long-term structural integrity.
Frequently Asked Questions
Sometimes. If the tile separates cleanly without cracking or chipping, it may be reused after the old adhesive has been completely removed. However, many tiles break during removal or retain hardened adhesive on their backs, making replacement the safer option.
This is one reason professionals recommend purchasing an additional 10% to 15% of flooring material during the original installation.
Yes. Repeated winter temperature changes, summer heat, seasonal humidity, and gradual structural settlement on sloping terrain all increase movement within building materials.
Proper expansion joints and high-quality flexible adhesives become even more important under these environmental conditions.
Walls, concrete slabs, cabinets, and flooring all expand differently. If tiles are installed tightly against fixed structures, there is no space available for normal movement.
The pressure eventually forces itself back into the flooring system, increasing the likelihood of buckling, cracked grout joints, and tile tenting.
Ask the installer to occasionally lift a freshly laid tile before it fully cures.
The back of the tile should display nearly complete adhesive coverage with consistent trowel ridges and very few empty spaces. Large hollow patches indicate poor adhesive application and significantly increase the risk of future flooring failure.


